Installing OPNsense was pretty straightforward - create USB media and boot from it. Use the default
login of installer:opnsense to start the installer. Im my case, I knew I had to set up a VLAN on
the WAN interface, but preferred to do this later through the web interface, so I left autodetect
interfaces do the work.
Note that by default, the web interface only listens on the LAN interface, and there is a deny all rule applied to the WAN interface after installation. If you are testing on a separate network with no internet facing WAN connection, you can configure only the WAN interface during installation. This will allow you to reach the web interface via the WAN address.
Then using a device connected to the same subnet, go to the router address and login with the
default root:opnsense account.
Network layout
The overall network topology I’m planning to implement will look something like this.
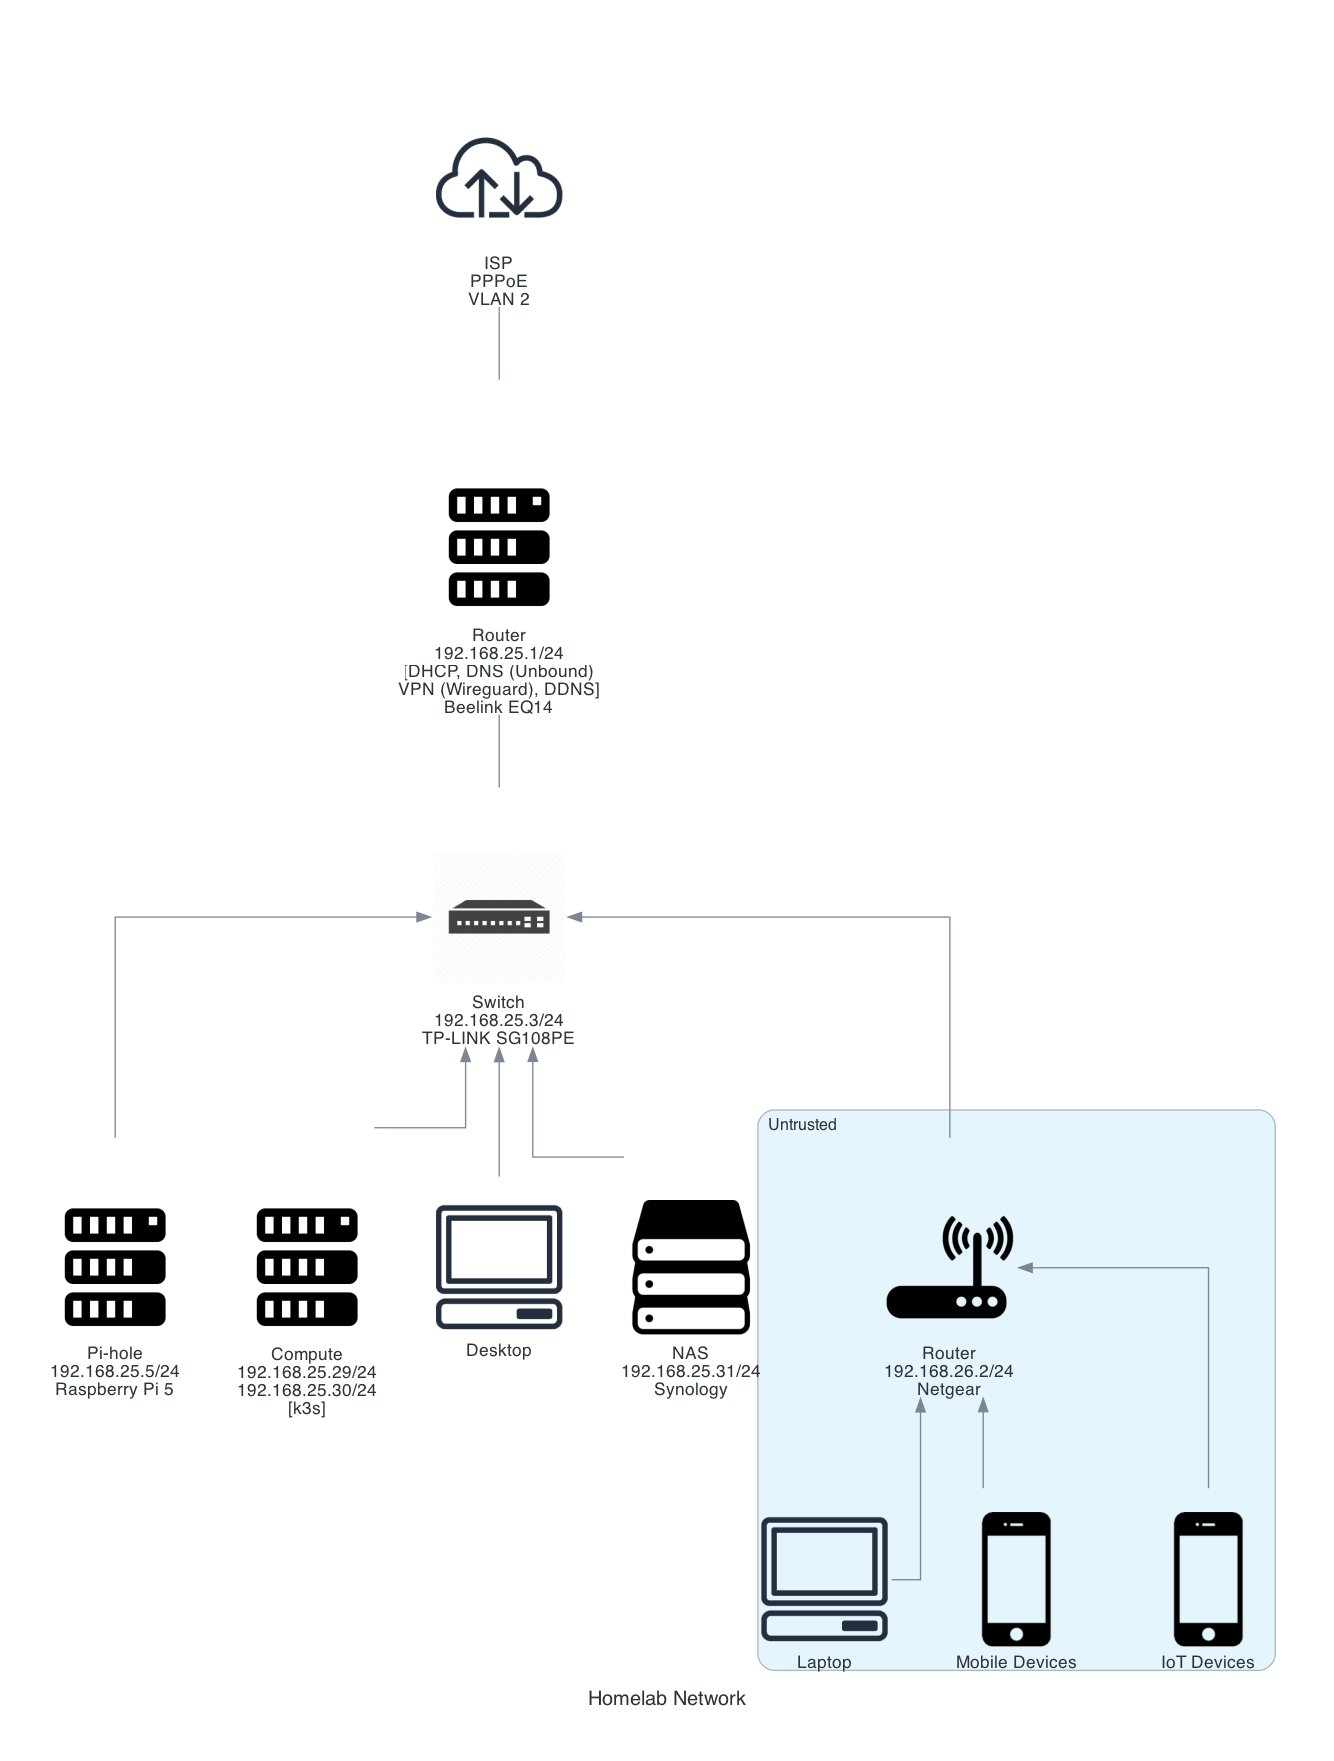
Planned network topology.
Configuration
Users
First thing to do is go into System > Access > Users and create myself a new password, change the
default admin password and login as my own user.
LAN
The default subnet configured for the LAN interface is 192.168.1.1/24. However, since I will be creating a VPN connection into this network, it is a good idea to select a different subnet to avoid IP range conflicts. Most consumer routers will be set up on 192.168.1.1/24 or 10.1.1.1/24 (and less commonly 172.16.0.0/x). In my case, I decided to use 192.168.25.1/24 for the static IPv4 address. Once saved, the web interface will be accessed from this address.
Before you save and apply this step, you might want to make sure that the switch management IP address is set to be in the new subnet.
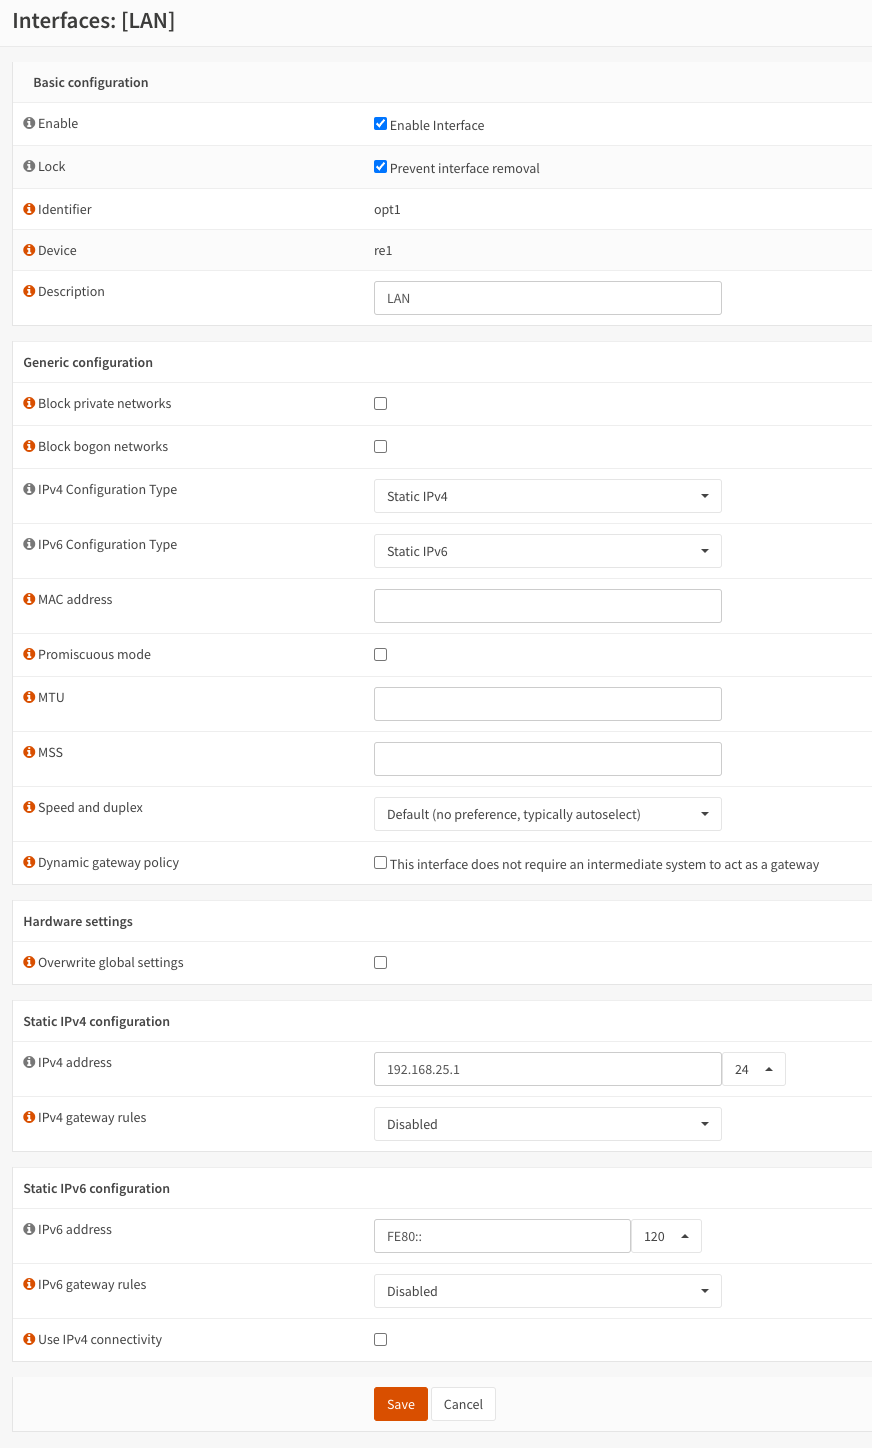
OPNsense LAN interface configuration
DHCP
In my setup, I want to use OPNsense as the DHCP server on this network. To do this, go to
Services > ISC DHCPv4 > [LAN]. Make the following configurations:
- Enable DHCP server on the LAN interface - Checked
- Set an IP address range for which the DHCP server will allocate IP addresses. I like to use a block at the front for statically assigned devices, with the remaining block used for dynamic assignment.
- DNS Servers - If you want to push out a DNS server via DHCP, you can specify it here. This will allow clients to connect directly to the DNS server, otherwise it will use the router IP by default. In my case, I decided to use OPNsense (Unbound) for DNS, and relay queries so I leave this blank.
Save and apply the changes.
If you are using a custom DNS server (e.g Pi-hole in my case), note that the upside of pushing the DNS server address via DHCP to clients, all DNS requests will appear to be coming from the router. Unfortunately, this means you won’t have useful data for the nice host breakdown graphs that Pi-hole provides.
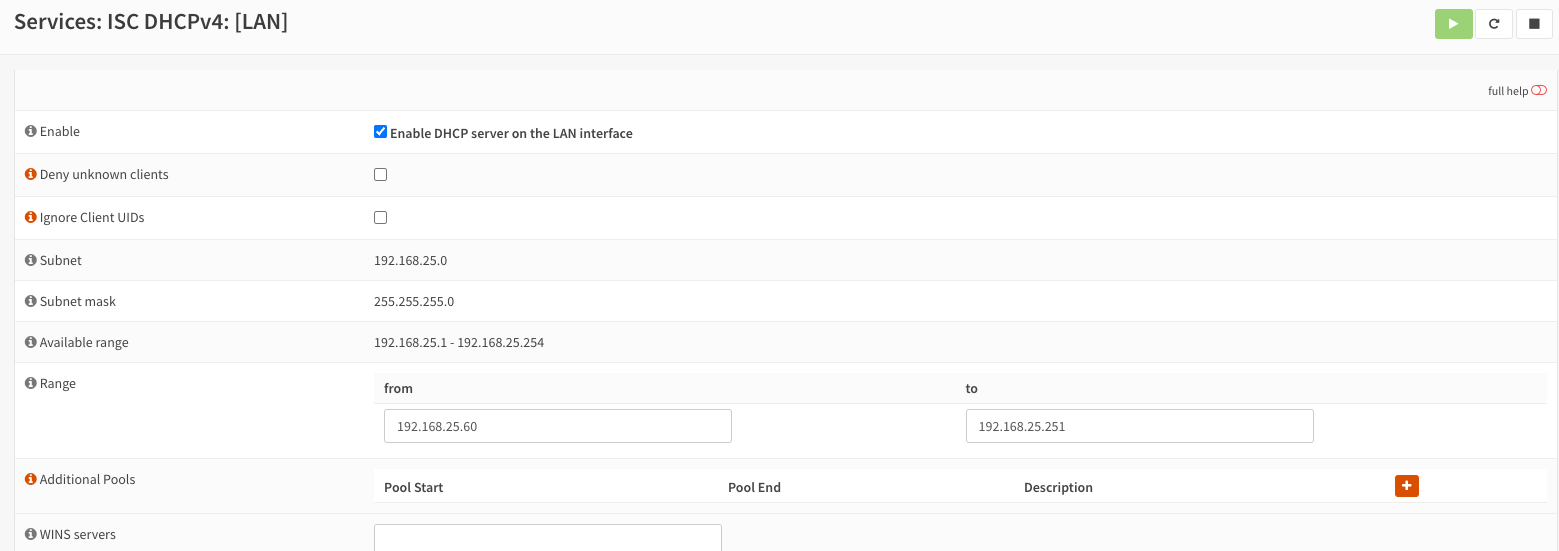
OPNsense DHCP configuration
Testing
Now you can connect a device to your LAN network and ensure that it receives an IP assignment. You
should also be able to see the host under Services > ISC DHCPv4 > Leases.
Static leases
At the bottom of the Services > ISC DHCPv4 > Leases page, you can now configure static leases for
devices based on MAC address.
WAN
For my WAN connection, I know that I have to set up a PPPoE connection on a VLAN. The order this
setup accomplished in OPNsense is VLAN > PPPoE > Assignments > Interface.
VLAN
Go to Interfaces > Other Types > VLAN to create a new VLAN. Name the device, and configure it. In
this case I will use a VLAN of 2, so i named this interface vlan0.2 (note the name must match the
required prefix) with a VLAN tag of 2, attached to my WAN interface. Save and apply this change.
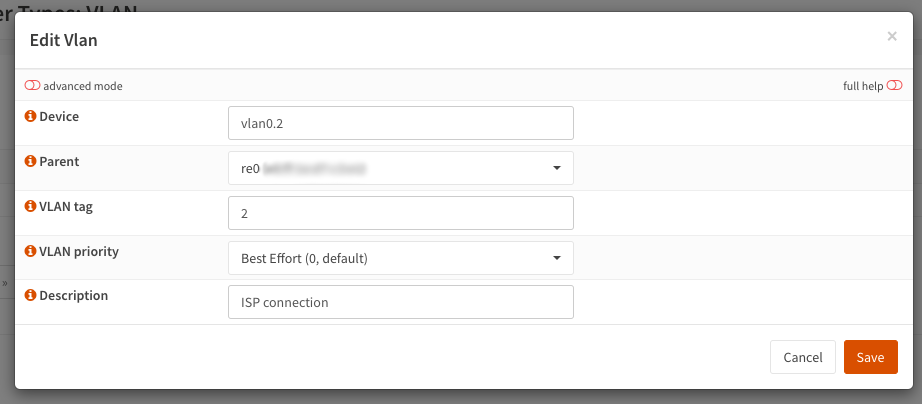
OPNsense VLAN configuration
PPPoE Connection
Go to Interfaces > Point-to-Point > Devices and add a new device. Select PPPoE as the link type
and the VLAN interface created in the previous step. FIll in the login details from your ISP. Leave
the Local IP blank if the IP address is obtained via DHCP (Dynamic IP).
Save and apply this change.
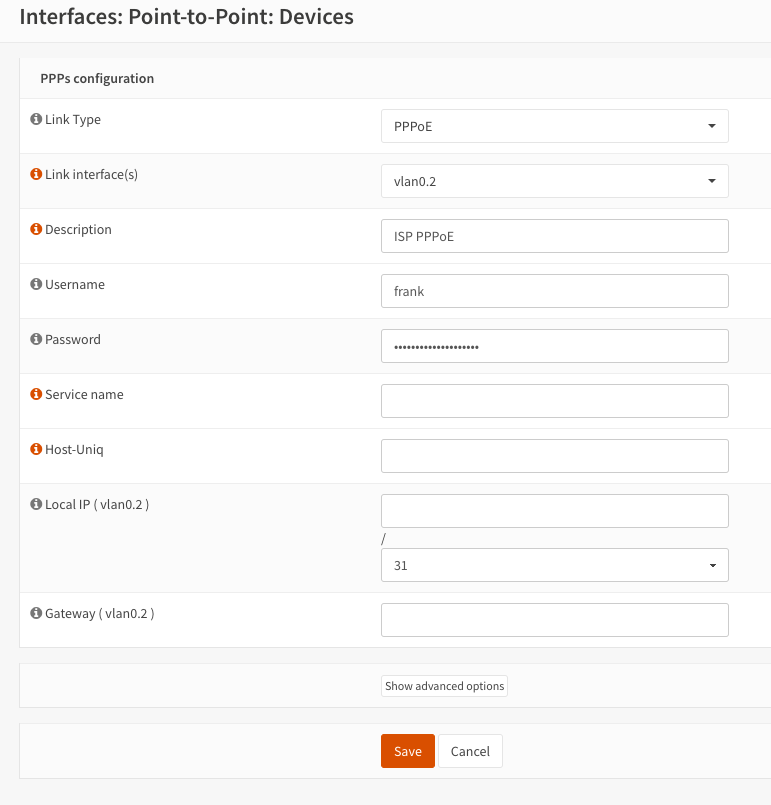
OPNsense PPPoE configuration
Next, assign the interface in Interfaces > Assignments. Select the pppoe1 device and give it a
description of WAN. Add and save this configuration. Now a device named [WAN] should appear in the
Interfaces sidebar.
WAN Interface
Now it is time to configure the WAN interface. Go to Interfaces > [WAN]. Configure the following options:
- Block private networks - Checked
- Block bogon networks - Checked
- IPv4 Configuration Type - PPPoE
- IPv6 Configuration Type - As required, but my ISP does not provide IPv6, so I will use None. The PPPoE configuration should be filled from the previous setup. Save this configuration.
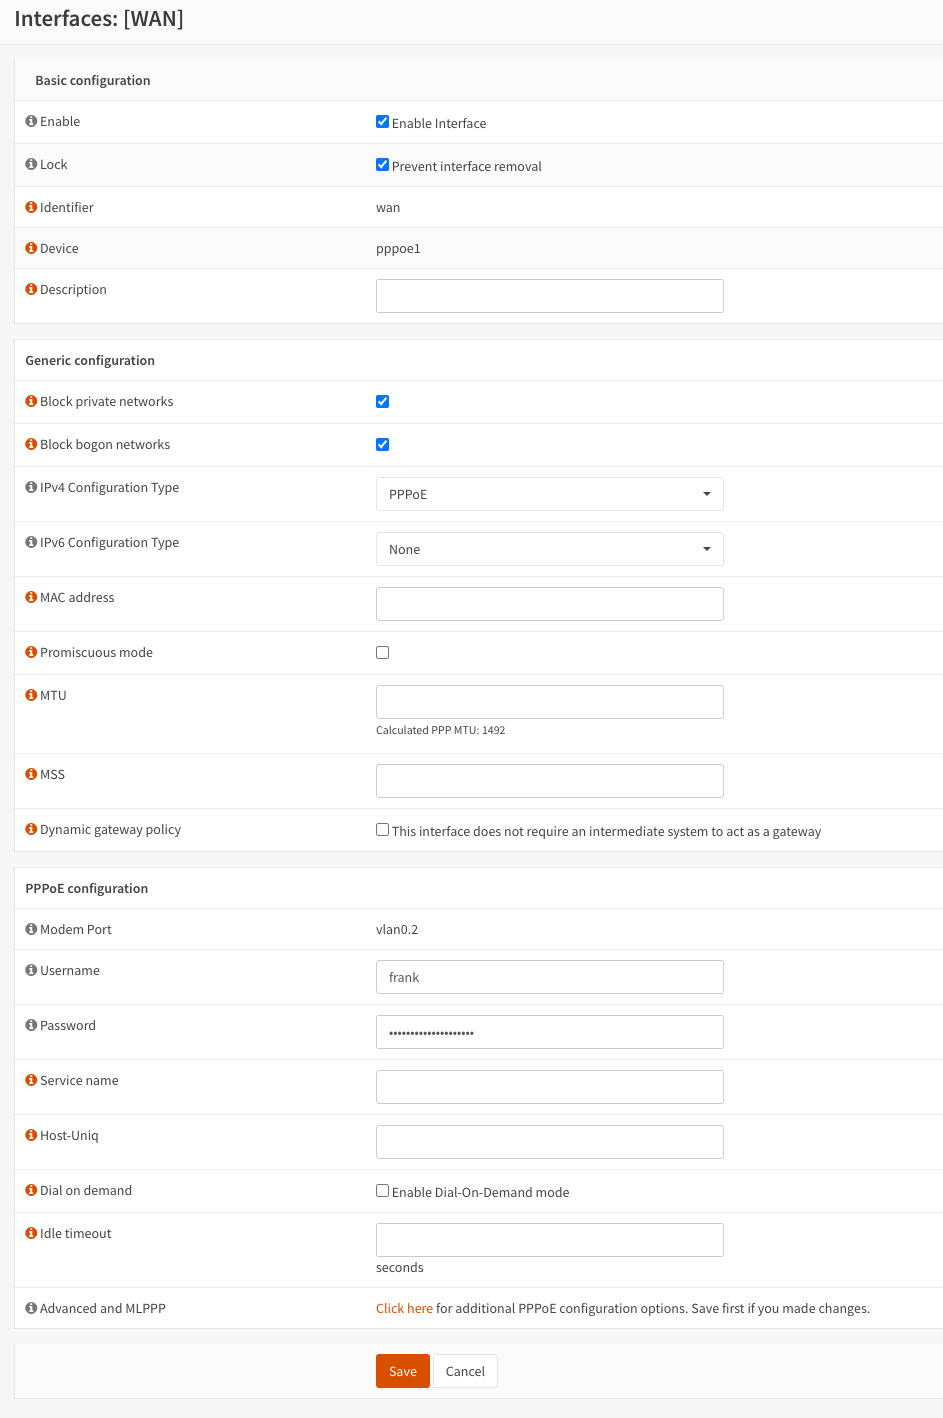
OPNsense WAN interface configuration
Firewall
Before connecting to the Internet, ensure that there is a default deny all rule applied on the WAN
interface in Firewall > Rules > WAN. Or, if you see no rules at all, this rule will be applied by
default. Now you can save and apply the firewall and WAN interface settings.
Testing
Once configured, you should be able to go to Lobby > Dashboard and see that the WAN gateway has
obtained an IP address, as well as some traffic on the WAN interface. If you configure the router on
your device interface to point to OPNsense, you should also be able to route to the internet.
General settings
A few useful general settings after configuring the initial interfaces.
Go to System > Settings > General:
- Set the local domain if you wish to use a custom one. (Don’t use
local!) - Set the correct timezone.
- If you are using a custom DNS server, you can set the IP here. (We will use this as a relay later.)
Go to System > Settings > Miscellaneous:
- Set the correct thermal sensor hardware (Intel in my case) for display of CPU temperatures on the main dashboard.
Additionally, you can enable NetFlow for use of the Insight feature. Go to Reporting > NetFlow:
- Select the interface you want to listen on, and specify which is the WAN interface.
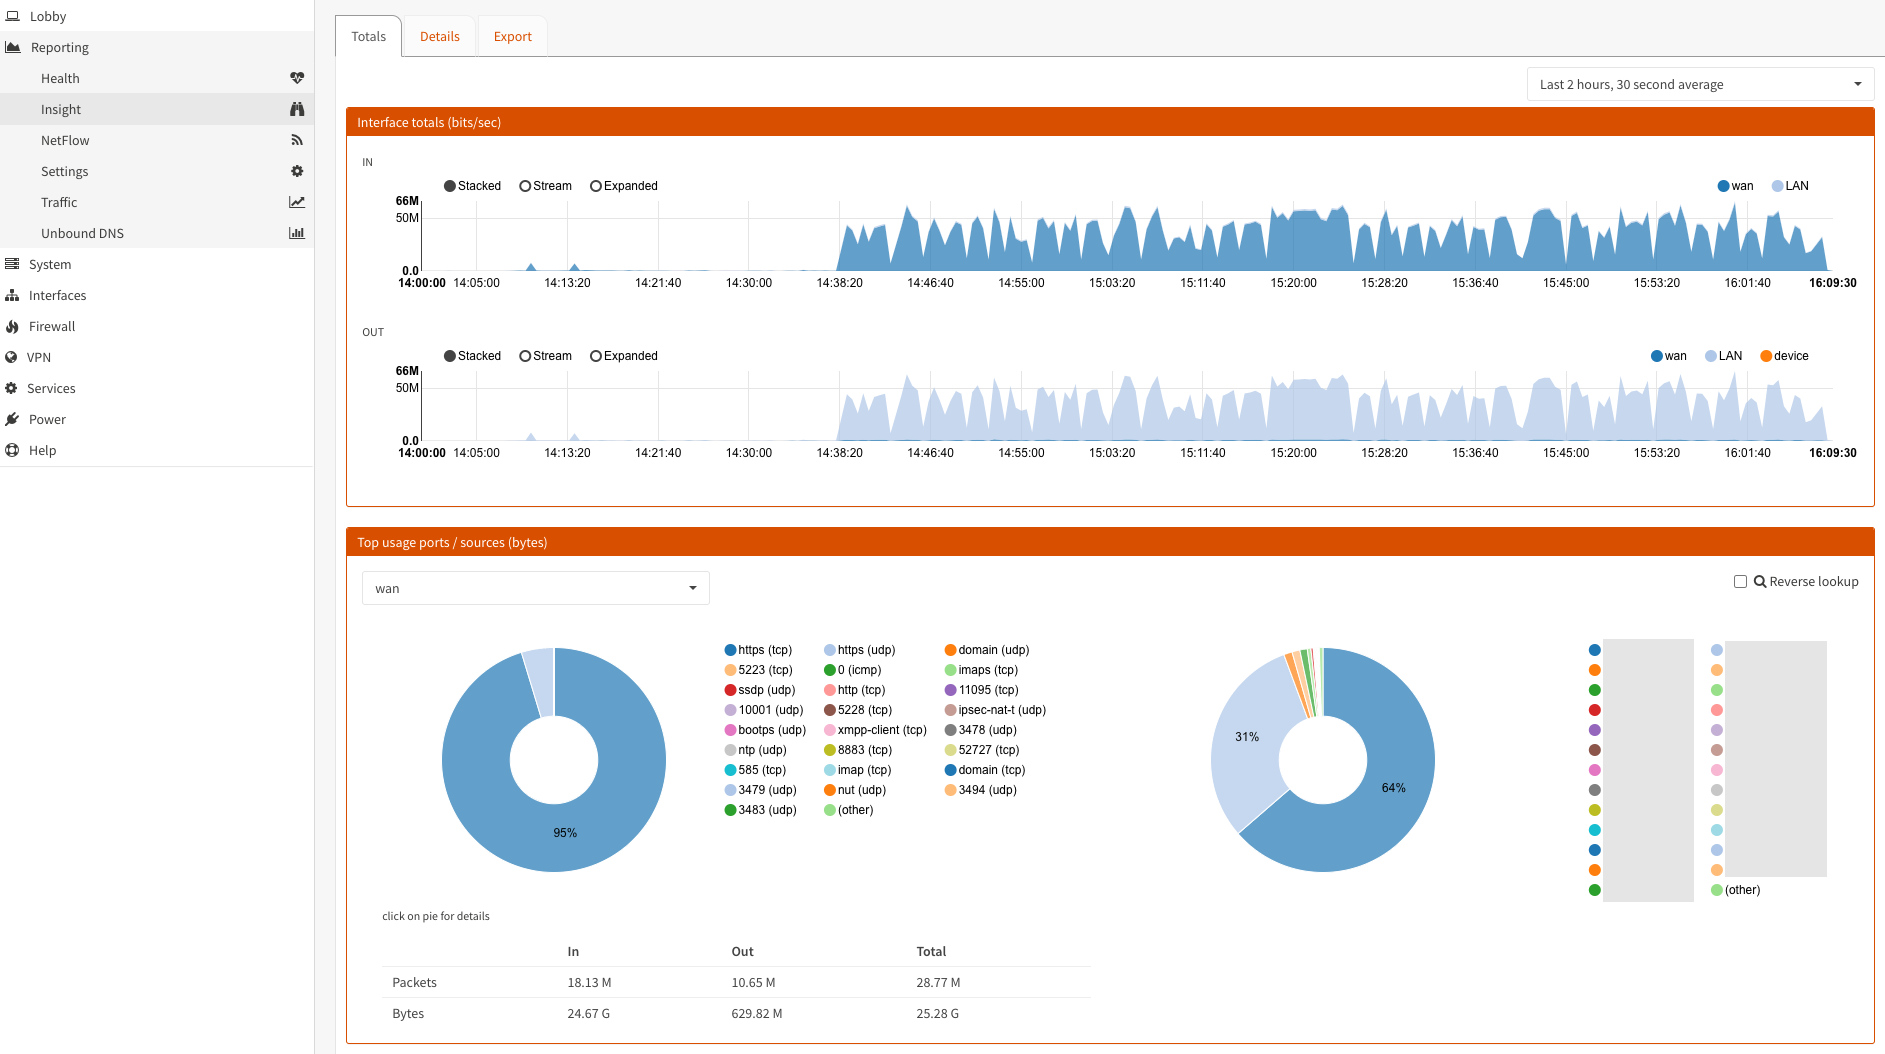
OPNsense NetFlow and Insight dashboard
